Grub Worms in Your Lawn: How We Spot, Treat & Repair
Grub worms can quietly destroy your lawn’s roots. Learn how to spot them early, when to treat, and what to expect from professional grub control and repairs.
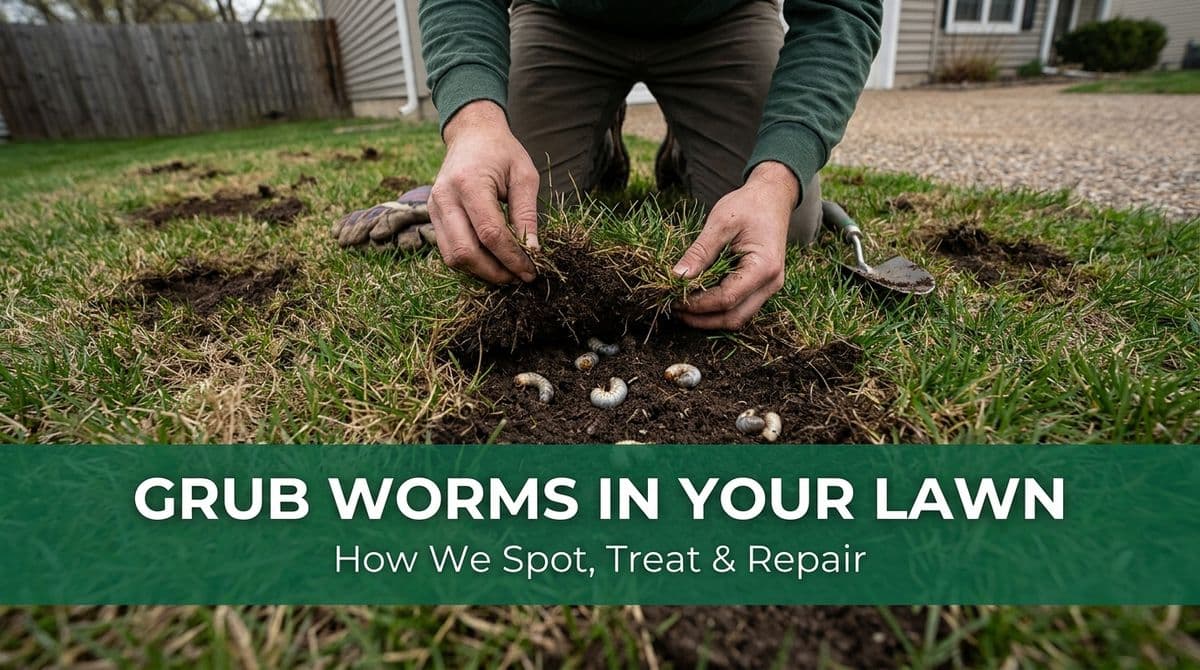
“I Think I’ve Got Grubs Again…”
We recently got a call from a customer — let’s call her Sarah — who said, “Y’all installed our lawn and I was calling to get it treated for grubs again.” We knew exactly what she meant. Her turf had looked great after installation, but now she was starting to see thinning patches and was worried those white grub worms were back.
As we checked her notes and scheduling, we told her what we tell every homeowner dealing with suspected grubs: before we talk repairs, we’ve got to make sure the grubs are fully under control. Otherwise, we’re just laying new sod or seed down on a buffet line for hungry larvae.
In this post, we want to walk you through exactly what we explained to her — how to spot grub worms early, the right time to treat, and what to expect when you bring in a professional crew like ours for grub control.
What Grub Worm Damage Really Looks Like
One of the first things we ask customers like Sarah is what they’re seeing on the lawn. A lot of common lawn issues get blamed on “grubs,” but the symptoms aren’t always grubs at all. Here’s what true grub damage usually looks like:
- Irregular brown or thinning patches that seem to worsen quickly, especially in late summer or early fall.
- Spongy or loose turf — when you walk on it, it may feel like a carpet on padding instead of firm soil.
- Grass that lifts up easily — you can grab a handful and roll it back like a rug, with little or no roots attached.
- Increased animal activity — birds, armadillos, raccoons, or skunks digging in the lawn to snack on grubs.
What we look for when we visit is the root zone. Healthy grass has a network of white roots anchoring it into the soil. With a bad grub infestation, those roots are chewed off, and the grass just sits on top of the dirt with almost nothing holding it down.
How to Check Your Lawn for Grub Worms
If you’re like Sarah and wondering whether you really have a grub problem, here’s a simple check you can do before you even call us:
- Pick a suspicious area. Choose a section where the grass is thinning, yellowing, or feels spongy.
- Cut out a small square. Use a shovel or hand trowel to cut about a 1-foot by 1-foot square of turf.
- Peel it back. Gently lift the grass and look at the top 2–3 inches of soil.
- Count the grubs. You’re looking for C-shaped, creamy white larvae with brown heads.
A few grubs (1–3 per square foot) is normal in many lawns and usually not a problem. When you start seeing 6 or more per square foot, that’s when we consider treatment. If you’re seeing 10+ in a small area, like we sometimes find during inspections, that section will likely decline quickly without intervention.
When Is the Best Time to Treat Grubs?
One of Sarah’s big questions was, “Is it too late to treat, or should we wait?” Timing matters a lot with grubs, and we walked her through how we look at it.
Grubs are the larvae of beetles (like Japanese beetles or June beetles), and they follow a predictable life cycle in most regions:
- Mid-summer: Beetles lay eggs in the lawn.
- Late summer to early fall: Eggs hatch into small grubs that start feeding on roots.
- Late fall: Grubs burrow deeper to overwinter.
- Spring: They move back up, feed some more, and then pupate into adult beetles.
Because of that cycle, we usually recommend:
- Preventive treatments in late spring or early summer, before eggs hatch.
- Curative treatments in late summer or early fall, when young grubs are actively feeding near the surface.
If you call us outside of those windows, it doesn’t always mean “don’t treat,” but we may recommend delaying certain products or adjusting the plan so you get the most effective control for your money.
Why We Don’t Repair Until the Grubs Are Gone
On the phone with Sarah, we told her we wanted to talk with our crew lead before doing any repairs and that it’s better not to re-sod or reseed until the grubs are killed. Here’s why we say that so often.
Grubs eat roots. If we come in and lay fresh sod or seed on top of soil that’s still full of active grubs, those new, tender roots become dessert. You’ll pay for repairs twice, and the lawn will still struggle.
Our typical approach is:
- Step 1 – Inspect and confirm. We look for visible grubs, root damage, and other issues (like fungus or drought stress) that might be involved.
- Step 2 – Treat the infestation. We apply a grub control product that’s appropriate for the season and your lawn type.
- Step 3 – Allow time for control. Most products need a bit of time to work, especially if they rely on grubs feeding to ingest the material.
- Step 4 – Plan repairs. Once we’re confident the population is knocked down, we talk about patching, overseeding, or replacing sections of sod.
This is the same reasoning we shared with Sarah: kill the grubs first, then fix the damage. It’s the difference between a quick cosmetic band-aid and a long-term solution.
What to Expect From Professional Grub Control
When homeowners call us about grubs, they’re often unsure what exactly they’re buying. With our service, here’s what you can typically expect:
1. A Clear Explanation of the Plan
We walk you through what we’re applying, why we chose it, and what the realistic expectations are. For example, are we aiming for full-season prevention, or are we knocking down an active outbreak?
2. Guidance on Watering and Mowing
Some grub products need to be watered in to reach the root zone where the grubs live. We’ll tell you:
- How soon after application you should water
- Roughly how much water is needed
- Whether you should hold off on mowing for a short time
With Sarah, we also coordinated around her regular mowing schedule so we didn’t bag up material we’d just applied.
3. Honest Talk About Damage and Recovery
Even with perfect treatment, dead turf won’t magically regrow if the crowns and roots are gone. We’ll point out which areas are likely to recover with good watering and fertilization and which spots will probably need:
- Overseeding
- Topdressing
- Or full sod replacement
In other words, treatment stops things from getting worse; then repair work and proper maintenance help the lawn fill back in.
How Homeowners Can Stay Ahead of Grubs
To wrap up, here are a few simple habits we encourage our customers to adopt so they don’t end up calling us every year for emergency grub control:
- Do a quick annual grub check in late summer by lifting a few small sections of turf.
- Watch for early warning signs like spongy turf and sudden brown patches, especially if you’ve had grubs before.
- Keep mowing and watering consistent so the lawn stays dense and vigorous — healthy grass tolerates minor grub presence better.
- Consider preventive treatment if your yard has a history of heavy grub pressure.
If you’re noticing suspicious patches like Sarah did or you’ve dealt with grubs in the past, we’re happy to come out, take a look, and give you a straightforward plan — from diagnosis to treatment to repair — so your lawn can get back to looking thick, green, and healthy again.